If you use VMware vRealize® products or VMware NSX-T™ with VMware Identity Manager™ 3.3.6, you upgrade to VMware Identity Manager version 3.3.7 directly from VMware Identity Manager 3.3.6.
For more information about the VMware Identity Manager 3.3.7 release, see the 3.3.7 release notes.
Supported VMware Identity Manager Upgrade Paths
The following upgrade paths are supported:
- From version 3.3.6, you can upgrade directly to version 3.3.7.
- From version 3.3.3, 3.3.4, and 3.3.5, you must upgrade directly to version 3.3.6 before upgrading to 3.3.7.
- From version 3.3.2, you must first upgrade to version 3.3.5, then upgrade from 3.3.5 to 3.3.6 and then to 3.3.7.
VMware Products That Can Upgrade to VMware Identity Manager 3.3.7
- vRealize Products such as VMware vRealize Automation™, VMware vRealize Suite Lifecycle Manager, VMware vRealize® Operations™, VMware vRealize® Business™ for Cloud , VMware vRealize® Log Insight, and VMware vRealize® Network Insight™ for authentication and SSO.
- vRealize products that are deployed and managed through vRealize Suite Lifecycle Manager can consume VMware Identity Manager versions 3.3.2 to 3.3.7.
- vRealize Suite Lifecycle Manager can now handle a brand-new installation of VMware Identity Manager 3.3.7 or an upgrade to 3.3.7 from VMware Identity Manager 3.3.6. Note: To upgrade from version 3.3.2, you must first perform an offline upgrade from version 3.3.2 to 3.3.5, upgrade from 3.3.5 to 3.3.6 and then to 3.3.7. To upgrade from 3.3.3, 3.3.4, or 3.3.5, you must first upgrade to 3.3.6 and then to 3.3.7.
- If you are using VMware Identity Manager 3.3.3 or 3.3.4 with vRealize Automation 8.3, the following minimum sizing requirements apply:
- 8vCPU
- 16 GB Memory
- 100 GB disk space
Procedure
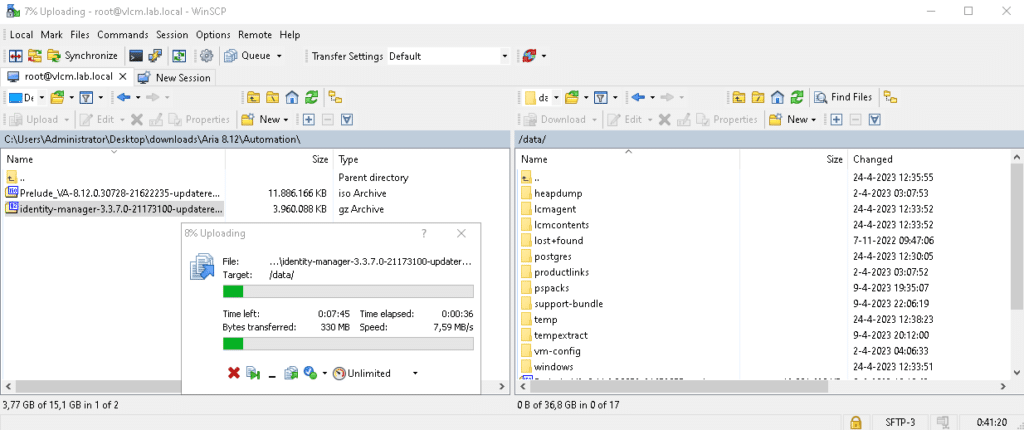
1. SSH to the vLCM appliance(VMware Aria Suite Lifecycle) and upload the binary “identity-manager-3.3.7.0-21173100-updaterepo-lcm.tar.gz” to /data/
2. Navigate to VMware Aria Suite Lifecycle > Settings > Binary Mapping and click Add Binaries
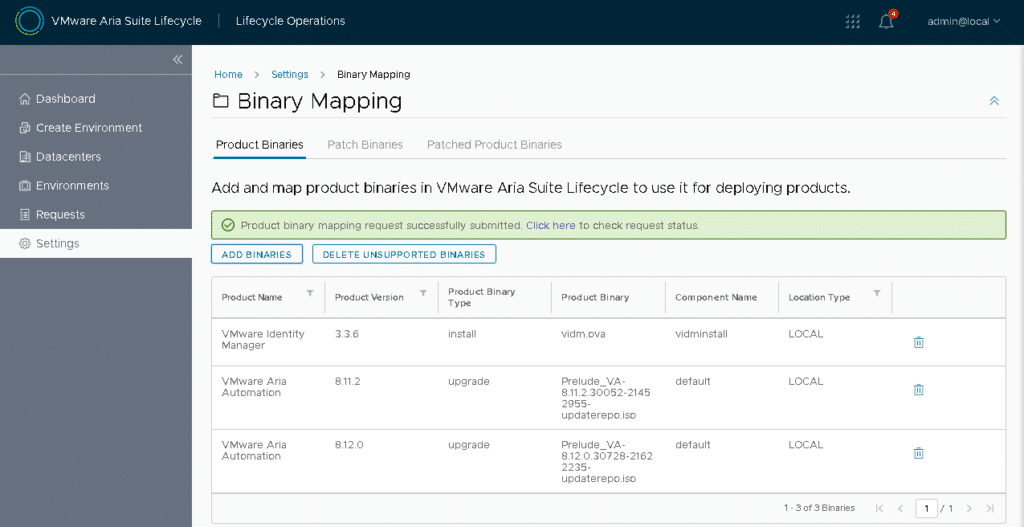
3. Select Local, fill in the Base Location, select the uploaded ISO and click Add

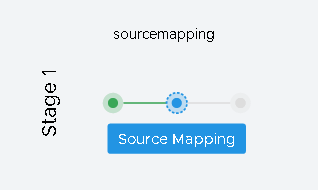
4. Wait for the Product Source Mapping Request to be completed.
5. Navigate to Environments > globalenvironment > View Details > Click Upgrade > Click Trigger Inventory Sync > Wait a few minutes and click Proceed
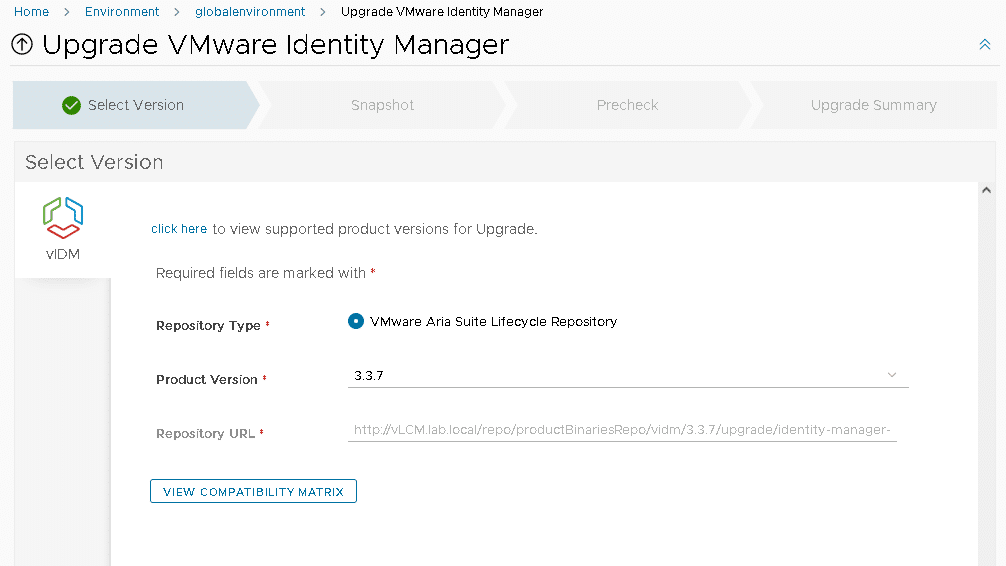
6, Click Next > Leave Take Product snapshot checked > Click Next and start Pre-Check
Note: I got the following error during the pre-check which I ignored.
Failed > VMware Identity Manager Network properties check. > Network properties should be properly assigned on the appliance. Network properties: [OVFENV_OK, OVFENV_NET_HOSTNAME, OVFENV_NET_DNS, OVFENV_IPV4_IP0, OVFENV_IPV4_NETMASK, OVFENV_IPV4_GATEWAY] are not present on the host: vidm.lab.local.The recommendation referred to https://kb.vmware.com/s/article/83587
7. Review the Upgrade Summary and click Upgrade.
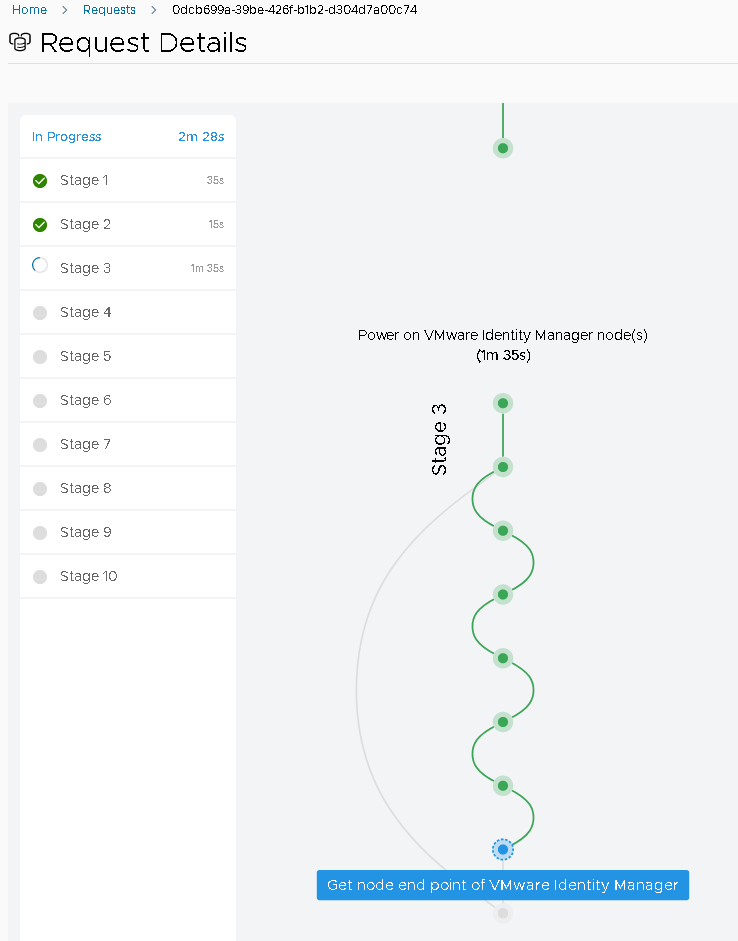
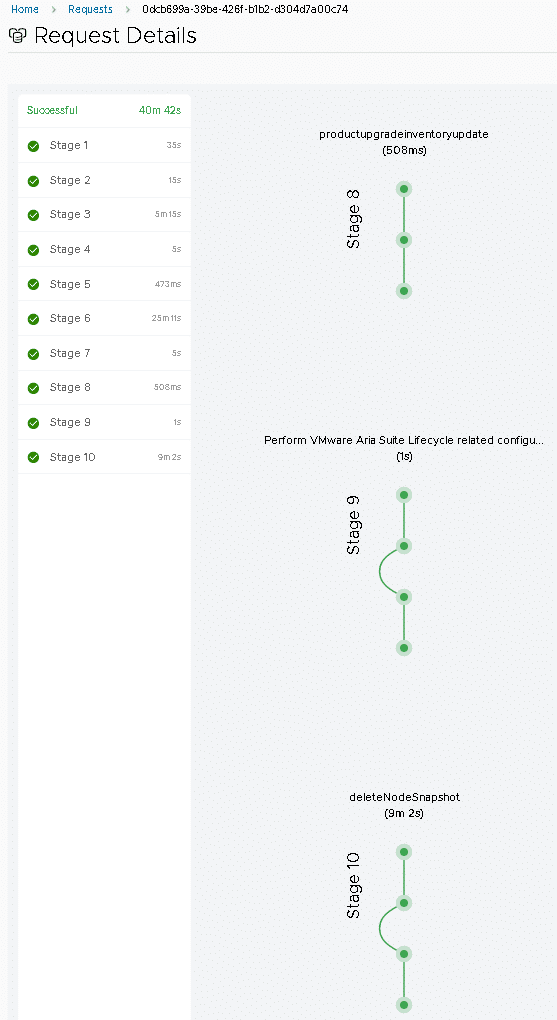
8. Upgrade took 40m and 42s for a single node deployment of VMware Identity Manager. Note that the error in the Pre-Check was ignored and didn’t cause any issues during the upgrade, vIDM is working as expected and no issues we’re encountered.