To upgrade your VMware Aria Suite products and VMware Aria Suite Lifecycle, you’ll need to follow a specific order. If you’re upgrading an older version of VMware Aria Suite Lifecycle, you should use the following upgrade order:
- Upgrade VMware Aria Suite Lifecycle.
- Upgrade VMware Workspace ONE Access.
- Upgrade VMware Aria Automation.
Once you’ve upgraded VMware Aria Suite Lifecycle, you can upgrade individual VMware Aria Suite products as well. It’s important to upgrade each product that is supported by VMware Aria Suite Lifecycle. Here are the steps you should follow:
- Upgrade VMware Aria Suite Lifecycle
- Upgrade Workspace ONE Access
- Upgrade vRealize Automation 8.x or VMware Aria Automation using VMware Aria Suite Lifecycle
- Upgrade a VMware Aria Suite Product
By following these steps, you can ensure compatibility of all products within the VMware Aria Suite. In this post we will show how to upgrade VMware Aria Suite Lifecycle.
Upgrading VMware Aria Suite Lifecycle
Upgrading your VMware Aria Suite Lifecycle is a critical step in ensuring that you’re getting the most out of your virtual appliance. Fortunately, the process is straightforward, and you can do it using an ISO file to install the upgrade. Here’s how:
Prerequisites
Before you start the upgrade process, you need to ensure that you have met the following prerequisites:
- Verify that your system meets the system requirements for VMware Aria Suite Lifecycle.
Requirements VMware Aria Suite Lifecycle:
– Minimum software requirements: vCenter 6.0 and ESXi version 6.0
– Minimum hardware requirements: 6 GB memory and 78 GB storage – Thick provision
– Virtual CPU: 2 - Take a snapshot of the VMware Aria Suite Lifecycle virtual appliance. This snapshot is important in case you encounter any problems during the upgrade process.
- Ensure that no critical tasks are currently in progress in VMware Aria Suite Lifecycle. Upgrading the appliance involves stopping and starting VMware Aria Suite Lifecycle services and rebooting the virtual appliance, which can corrupt tasks that are in progress.
- If you’re upgrading through a repository URL or CD-ROM, download the VMware Aria Suite Lifecycle upgrade binary from the MyVMware portal in advance. The file name should look like “VMware-vLCM-Appliance-8.X.X.XX-XXXXXXXX-updaterepo.iso.”
Note: that if you’re upgrading VMware Aria Suite Lifecycle through an ISO file, you cannot use the easy installer ISO file. Instead, you must use the VMware Aria Suite Lifecycle upgrade ISO file.
Procedure
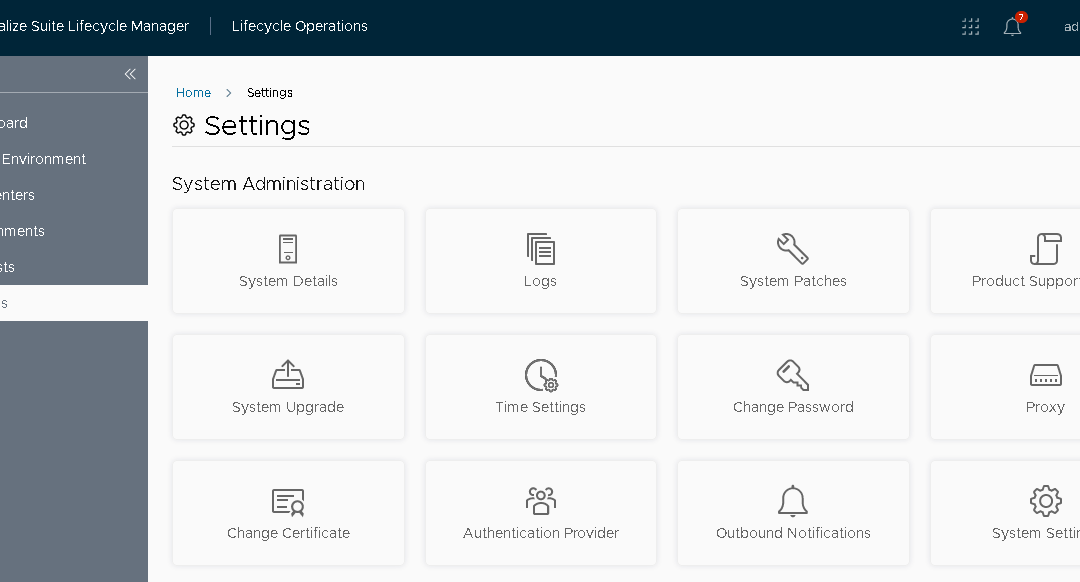
1. From the My services dashboard, click Lifecycle Operations and click Settings.
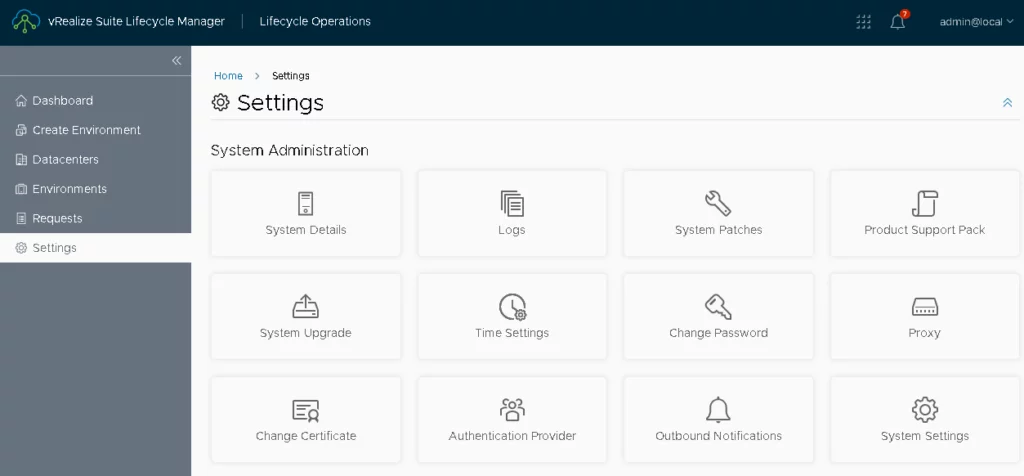
2. Click System Upgrade and click Create Snapshot
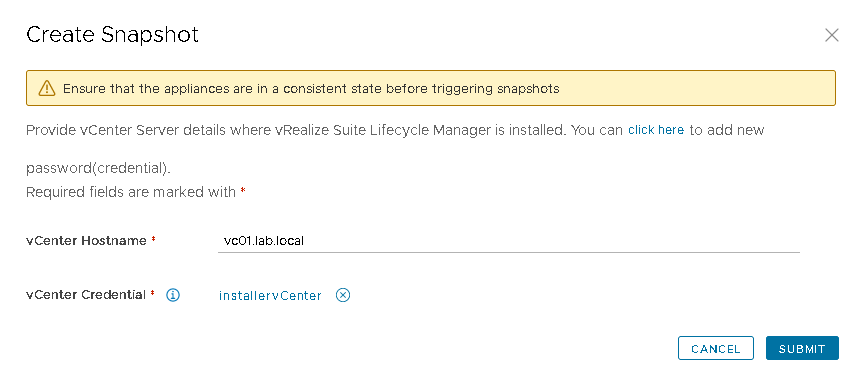
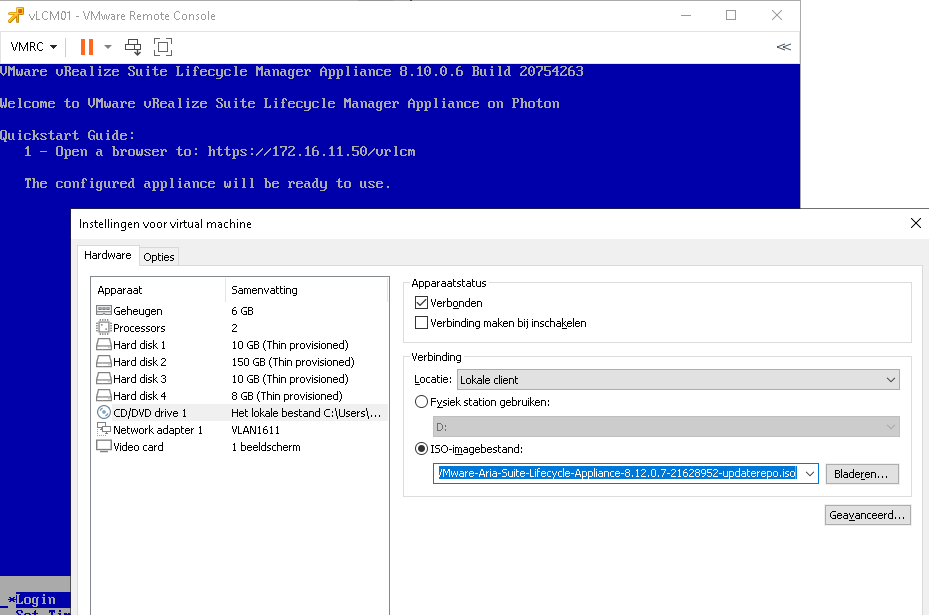
3. Provide the vCenter Server hostname and password where the vLCM appliance is located. Wait for the snapshot to be completed and attach the updaterepo ISO to the vLCM appliance in vCenter. You can use the Remote Console if you don’t want to upload the ISO to a datastore.
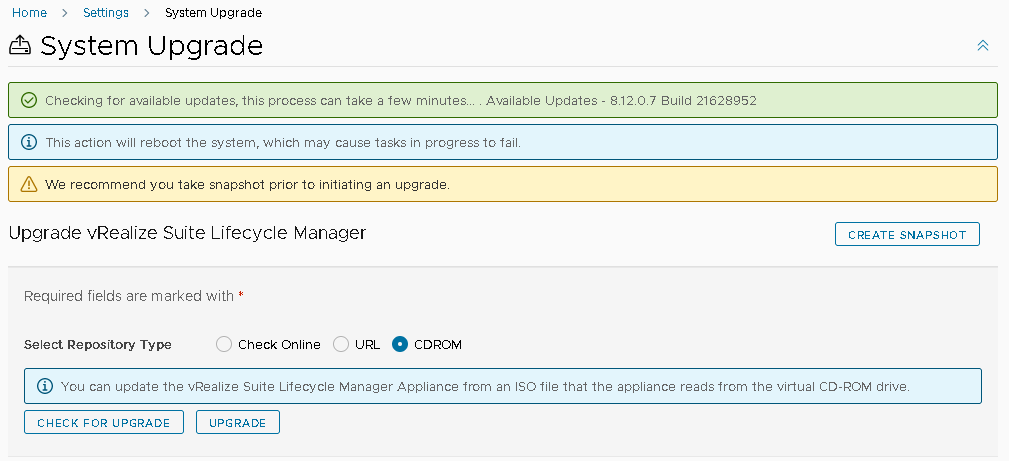
4. Select the repository type for VMware Aria Suite Lifecycle updates.
Check Online You can check if the upgrades are available online. To use this option, the VMware Aria Suite Lifecycle virtual appliance must have access to vapp-updates.vmware.com.
URL Enter your repository URL for updates. To use this option, extract the ISO containing the upgrade files to a private repository. Do not use a private repository that requires authentication for a file access.
CD-ROM You can update the VMware Aria Suite Lifecycle Appliance from an ISO file that the appliance reads from the virtual CD-ROM drive.
We are using the CD-ROM option in this example now the CD-ROM is attached through the VMware Remote Console we can select the option and continue.
5. Click Check for Upgrade.
After few minutes, VMware Aria Suite Lifecycle displays a message indicating if there are updates available.
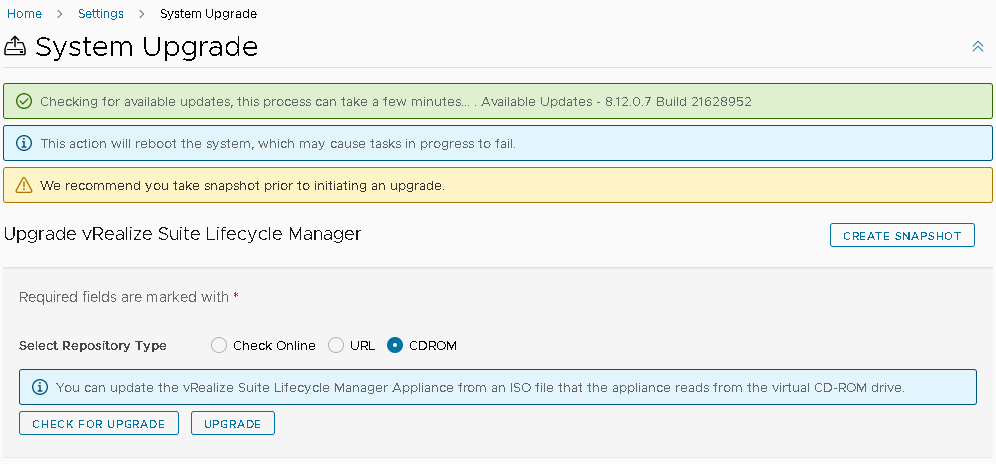
6. Select the Repository Type, and then click Upgrade.
A: When VMware Aria Suite Lifecycle is not connected to the internet, you can download the VMware Aria Suite Lifecycle Update Repository Archive binary from My VMware portal.
B: The downloaded ISO should be attached to VMware Aria Suite Lifecycle VM’s virtual CD-ROM drive. To do this, you can either upload the ISO in a content library of the vCenter server hosting VMware Aria Suite Lifecycle or you can upload in a data store that the VMware Aria Suite Lifecycle VM can access. After uploading, you must attach the ISO to the VMware Aria Suite Lifecycle VM’s CD-ROM device by editing the VM’s hardware configuration from the vCenter inventory. From VMware Aria Suite Lifecycle UI, select CD-ROM based upgrade option and proceed.
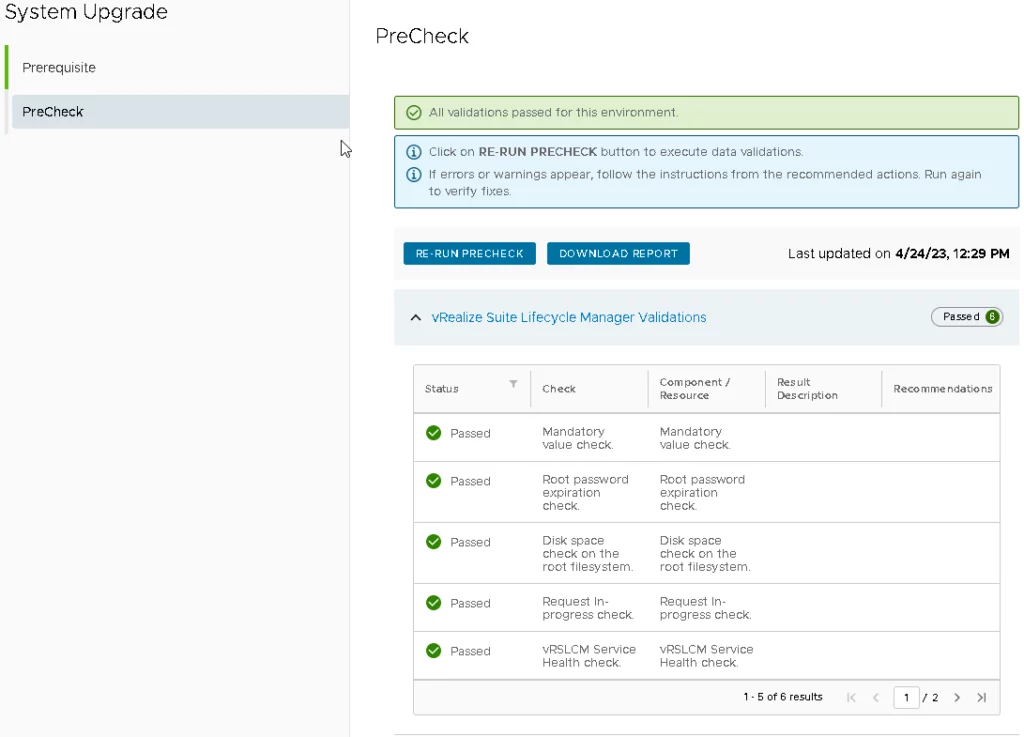
7. In the Prerequisites section, click the Product snapshots check box and then click Next. When the pre-check validation is finished, download the report to view the checks and validation status.
8. Click Upgrade after a successful pre-check validation. I needed to refresh the page to see the following:
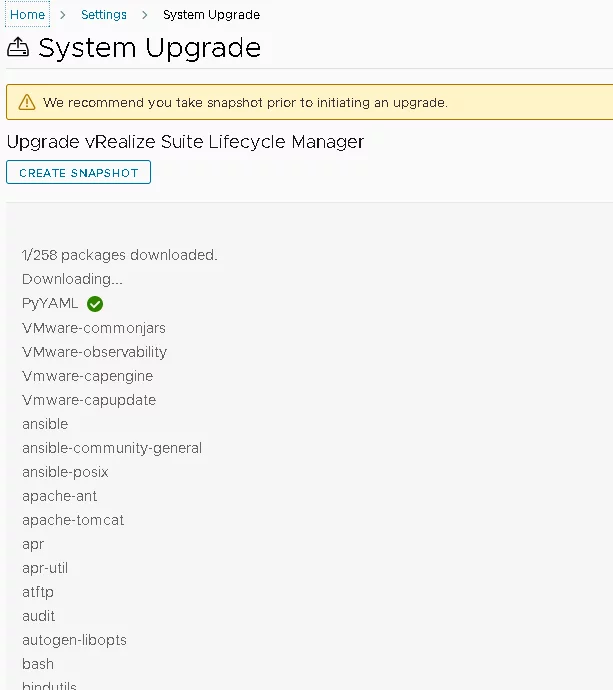
I refreshed the page a second time and waited a few minutes for the services to restart.
9. After all services are restarted, log in to the VMware Aria Suite Lifecycle UI and click Settings > System Upgrade to check for the upgrade successful message. When upgrade is finished,VMware Aria Suite Lifecycle displays the upgrade completion message. If you do not see this message, wait for a few minutes and refresh the UI.

Continue to update all other products to supported versions as shown in Settings > Product Support Pack.
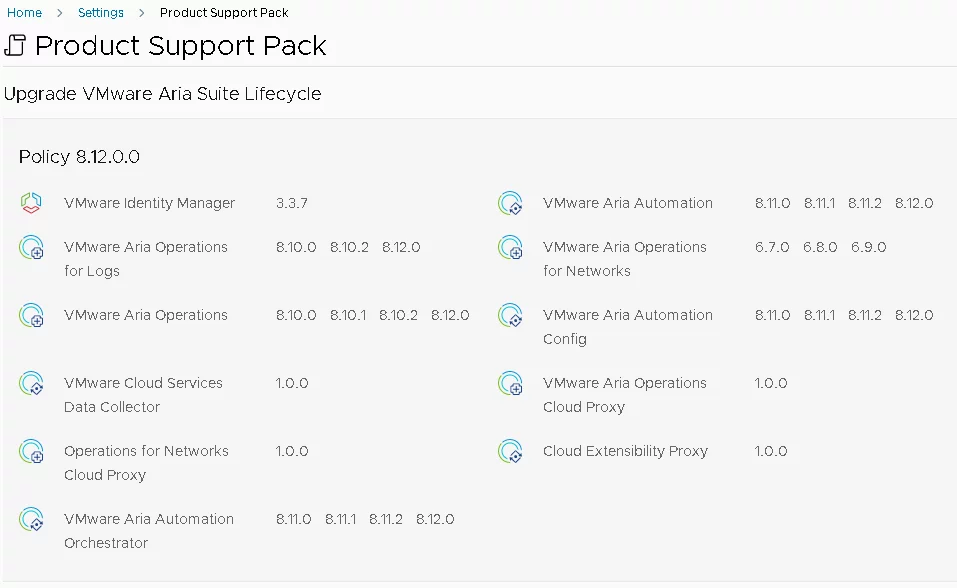
For me the next step is to update the VMware Identity Manager from 3.3.6 to 3.3.7 after that I will update VMware Aria Automation from 8.11.2 to 8.12.
Source: https://docs.vmware.com/en/VMware-Aria-Suite-Lifecycle/8.12/lifecycle-install-upgrade-manage.pdf