To obtain a new certificate for VMware Identity Manager, start by generating a CSR. Once you have generated a CSR, submit it to a Certificate Authority (CA) for approval. For example, you can submit the CSR to a Windows CA.
Here is an example of a CSR generated in the vLCM Locker:
-----BEGIN CERTIFICATE REQUEST-----
MIIDHTCCAgUCAQAwZzEWMBQGA1UEAwwNdlJBLmxhYi5sb2NhbDELMAkGA1UECwwC
..........
SI0MVFrGdfYMflsUQ7N/6YBsdmovdKDzhJeZG+urGJxJ
-----END CERTIFICATE REQUEST-----
-----BEGIN PRIVATE KEY-----
MIIEvQIBADANBgkqhkiG9w0BAQEFAASCBKcwggSjAgEAAoIBAQDGzLDd4hz8E1hG
..........
cOdCYLJ8alwI7XgfH2BAXHc=
-----END PRIVATE KEY-----
Once you have generated a CSR, ensure that you store the private key in a safe and secure location, as it will be needed later to import the signed certificate in the vLCM Locker. Next, submit the CSR to a Certificate Authority (CA) for approval. Once approved, download the signed certificate in Base64-encoded format.


To successfully import the certificate to the vLCM Locker, ensure that you have the complete certificate chain, including all Sub CAs. Take a look at the example below:
-----BEGIN CERTIFICATE-----
MIIELDCCAxSgAwIBAgITIAAAAAKkSFruzzUoHwAAAAAAAjANBgkqhkiG9w0BAQsF
         CERTIFICATE
AMYOT+UKj1dGEDNDsI/8th/1ECxR9LGXr1qYt6cRljdpygPcCikLsNsPRKF9x02z
RKJimxBO5Gri0K1oDWv+ow==
-----END CERTIFICATE-----
-----BEGIN CERTIFICATE-----
MIIC/zCCAeegAwIBAgIQTQoVlUe0S7NJ1GKug4guhTANBgkqhkiG9w0BAQsFADAS
         SUB CA CERTIFICATE
oPpLs2tMYcgOas6WhNmVQH/854Z3bKw7xOYqzi+aaPpKx6jSXZDM4q7D2pzQxgn7
Zs5I
-----END CERTIFICATE-----
-----BEGIN CERTIFICATE-----
MIIC/zCCAeegAwIBAgIQTQoVlUe0S7NJ1GKug4guhTANBgkqhkiG9w0BAQsFADAS
         ROOT CA CERTIFICATE
oPpLs2tMYcgOas6WhNmVQH/854Z3bKw7xOYqzi+aaPpKx6jSXZDM4q7D2pzQxgn7
Zs5I
-----END CERTIFICATE-----
Once you have obtained the signed certificate in a .cer file format, you will need to edit the file in Notepad to include the Root and Sub CA’s public certificates below the first block. Refer to the example above for guidance.
Next, navigate to the vLCM Locker and select “Import Certificate.” Then, copy and paste the Private Key that was included in the CSR, along with the complete certificate chain, and click “Import” to complete the process.


From the Environment page, select a product and click on the vertical ellipses.
Click Replace Certificate.

Review the Current Certificate and click Next.
Select the certificate imported in the locker from the drop-down menu and click Next.
Review the certificate summary and click Next.
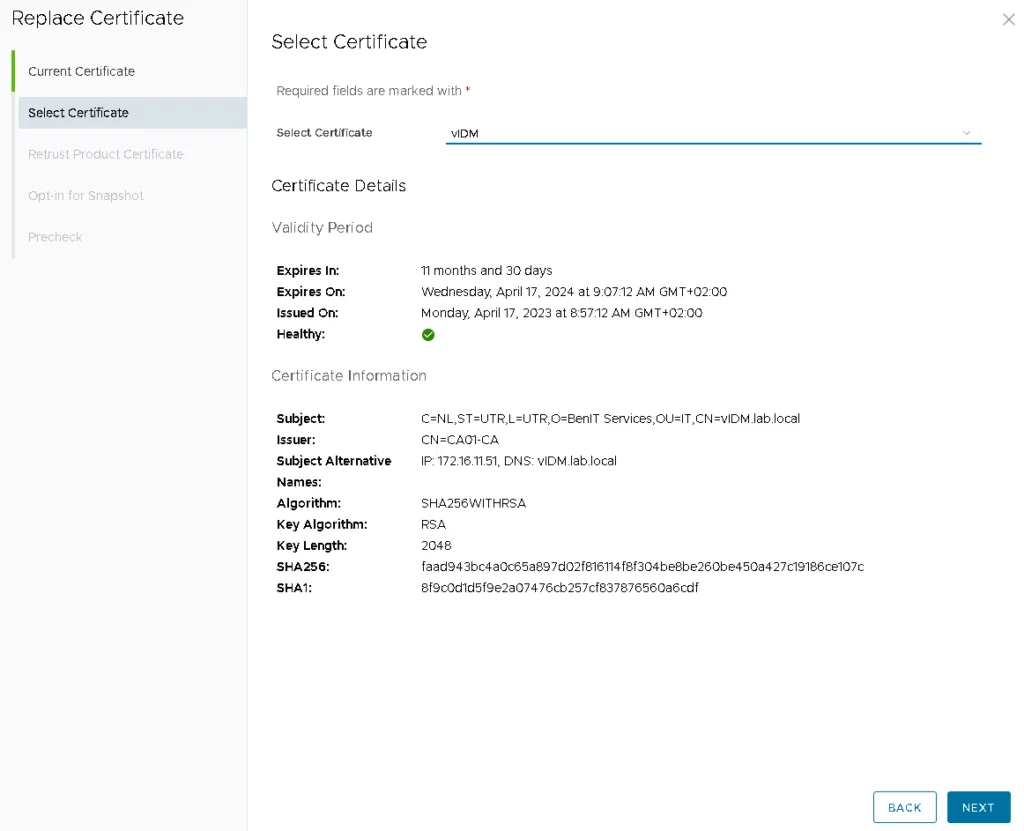
Select the product instance and click Next. If you are replacing a Workspace ONE Access certificate, it is necessary to re-trust all of the configured products. By default, all of the products will be listed in the “Re-Trust Product Certificate” wizard.

You have the option to select the “Opt-in for Snapshot” checkbox, which allows you to take snapshots for products that don’t have a built-in certificate rollback capability. This option can be used to revert to the snapshot in case there is a failure during the certificate replacement process. Please note that this option is only applicable for vRealize Business for Cloud, Workspace ONE Access, and vRealize Network Insight. If the certificate replacement request fails, you can revert to the snapshot and resubmit the failed request to rollback the operation.

To validate the certificate information, click RUN PRECHECK and click Finish.
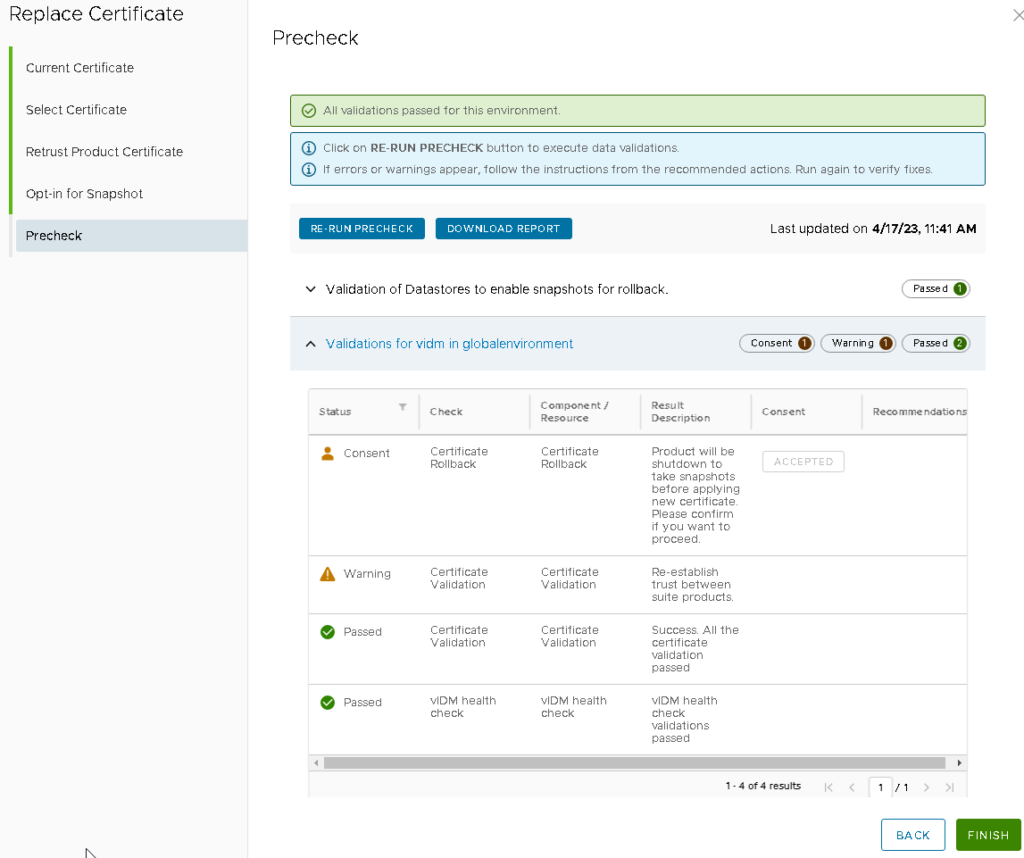
Click Accept for Certificate Rollback and Finish.
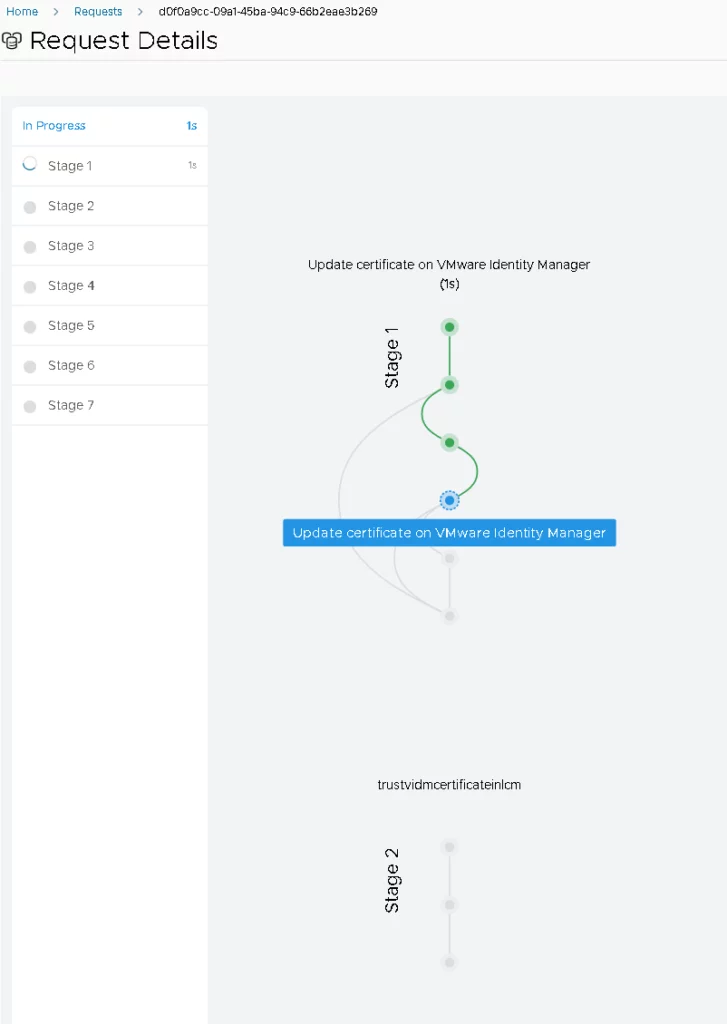
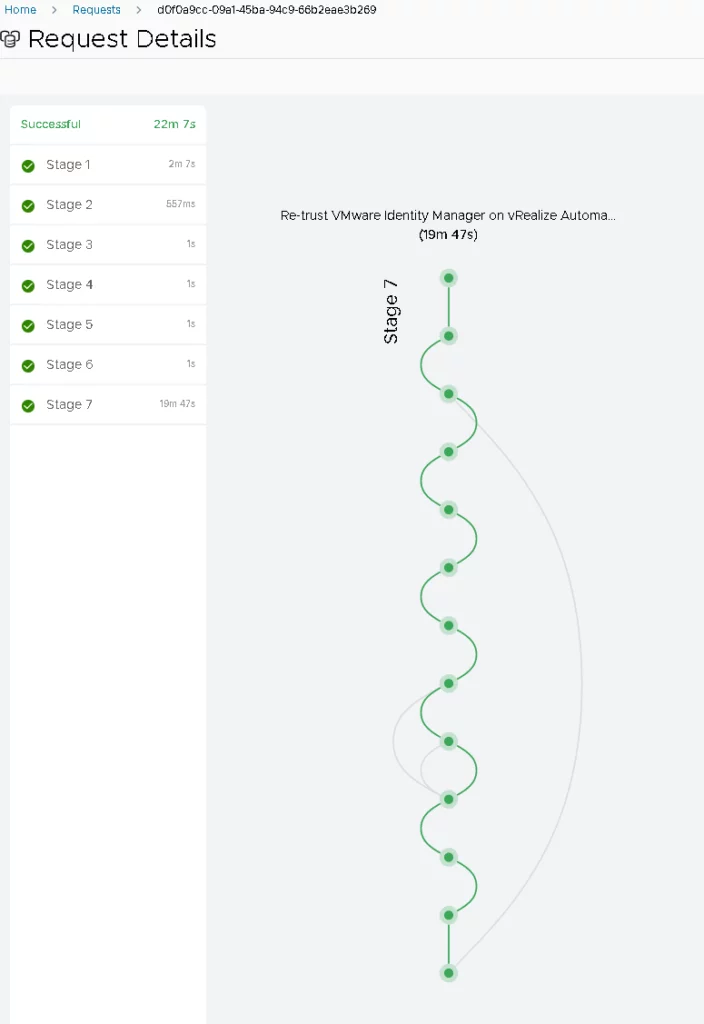
The certificate replacement process for VMware Identity Manager, including the Re-Trust with VMware Aria Automation, took approximately 22 minutes without creating a snapshot.
Your browser now trusts the VMware Identity Manager certificate.

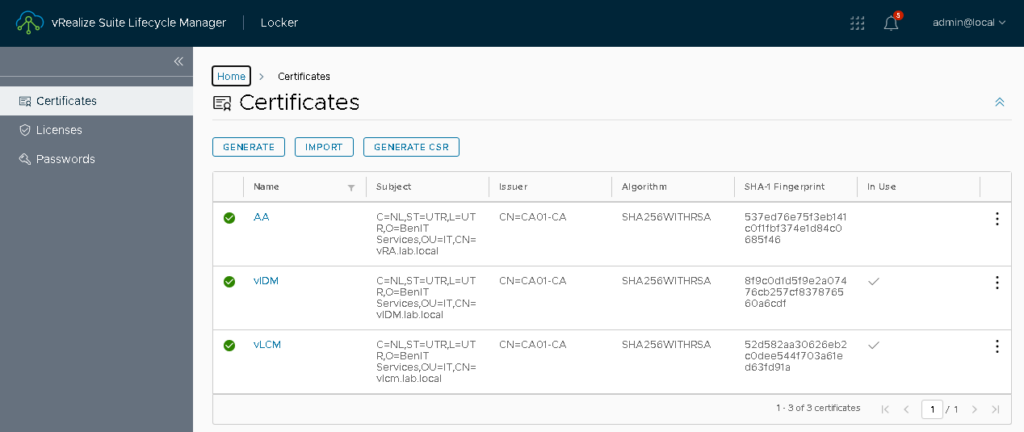
Additionally, you can see that the vIDM certificate is now marked as “In Use” in the vLCM locker.
Source: https://docs.vmware.com/en/VMware-vRealize-Suite-Lifecycle-Manager/8.10/com.vmware.vrsuite.lcm.8.10.doc/GUID-66D54179-D9E1-414C-B956-B21F5B0B463C.html